[convertkit form=1708200]
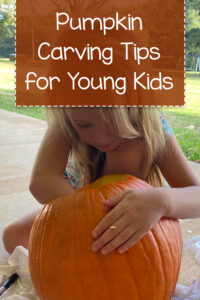
Wondering how to teach a first grader to carve a pumpkin like a pro? This was a fun fall activity we did as a family. For the past five years we have painted pumpkins, but this year our daughter wanted to give it a go and carving a pumpkin. She picked the pattern out of a book, and we followed the steps. It was so much easier than we anticipated it would be.
Carve a Pumpkin Like a Pro Video
Pumpkin Carving Supplies
1 pumpkin
1 pumpkin carving book kit
1 roll of Saran Wrap
1 trash bag
1 plastic grocery bag
Tips for Carving the Pumpkin
- Buy a Pumpkin Carving Kit
We like the Pumpkin Masters carving kit that comes with patterns, saws, a poking tool, and a scoop.
We usually buy our kits on clearance after Halloween, but even the $8 cost on Amazon isn’t bad. The kits come with patterns for up to 12 pumpkins, and the tools are reusable year after year if you take care of them. - Buy a Pumpkin & Wash It
Wash your pumpkin off with water to remove any dirt, and dry it off with a towel.
You’ll want to pick a pumpkin that’s large enough for your pattern and fairly smooth. - Prepare Your Pumpkin Carving Area
Place a trash bag under the area where you’ll be carving the pumpkin.
Get another trash bag or plastic grocery bag to put the pumpkin guts in.
If you’re planning keep pumpkin seeds to roast or plant, you might also want a bowl to put them in. 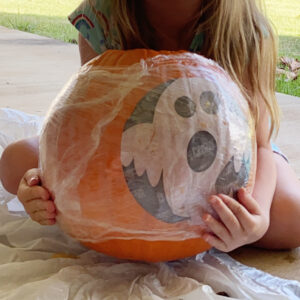 Wrap the Pattern
Dip your pattern in water and place it on the pumpkin.
Wrap Saran Wrap around your pumpkin to hold the patter in in place (two to three wraps around the pumpkin will work great).
Alternatively … you can also use a push pin to poke out your pattern onto the pumpkin before cutting. But we prefer the Saran Wrap method.- Cut Off the Lid
Use your pumpkin kit saw to cut off the lid of the pumpkin. Set the lid aside. - Hallow the Pumpkin
Use a spoon or pumpkin scoop to loosen as much of the “pumpkin guts” as you can away from the sides of the pumpkin.
Scoop it out with your hand into a bowl, separate out the seeds (if you’re keeping them) and then toss the remaining junk into the garbage. - Carve Your Pumpkin
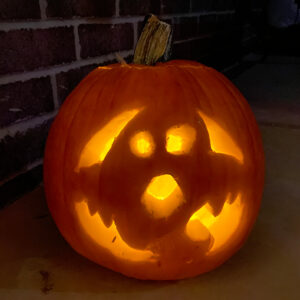
Carve your pattern into the pumpkin. - Light & Enjoy
Light your pumpkin with a battery operated candle and enjoy!
Save to Pinterest
If you found this helpful, save it to Pinterest!